Help
Table of Contents
- Introduction
- Searching
- Detailed Search
- Browsing the Publications
- Permalinks
- Content Viewer’s Functions
- OCR – Optical Character Recognition
- Editing the OCR Text
- Personalised Services – My DIGAR
- Adding Tags to Articles
- Adding Articles to Private Lists
- Printing
- Technical Requirements
Introduction
The aim of DIGAR’s collection of Estonian articles is to provide a unite web portal for all digitally created or digitised newspapers, journals and other serials that are published abroad in Estonian or here in Estonia and make them accessible.
You can just browse the collection or search articles by content, read the full texts, make notes, compile a bibliographic index, and send the lists to your e-mail account, share information through social networks and a lot more.
Everything published in these publications has been treated as articles – except photos and illustrations, advertisements, comics, horoscopes, crosswords and Sudoku puzzles.
All text is inserted automatically using optical character recognition software. The text has not been edited, except the names of authors, article headlines and photo captions.
Searching
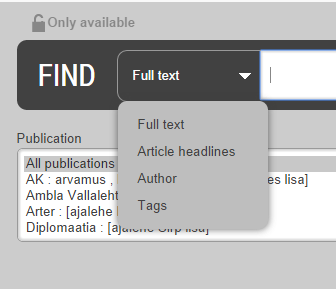
Insert one or more keywords to the search field and click Search  . The search includes by default the whole portal (full text), but you can choose to search only by article headline, author or tags. The result shows the entries that contain the keyword. For more complex searches you can use Detailed search.
Search is NOT case-sensitive. A search for ülle tamm is the same as a search for Ülle Tamm.
Phrase Search
To search a certain phrase use quotation marks around it, e.g. "Kriitilise lingua franca ajastu".
NB! If you don’t use quotation marks, words are treated as keywords irrespective of their order.
For example, to search the phrase Kriitilise lingua franca ajastu from full text you have to insert it like this:

Logical Operators AND, OR, NOT
You can narrow down results by using logical operators:
AND – Result contains all keywords; limited search
OR – Result contains at least one of the keywords; expanded search
NOT – Result does not contain the keyword; limited search
NB! Logical operators have to be inserted always in uppercase (AND, OR, NOT), otherwise the system treats them as keywords.
For example, to search about both loodus and mets from full text, it has to be inserted like this:

Shortening the Keyword
To search only by the beginning of a word cut it off with an asterisk (*) that replaces the rest of the letters. For example, inserting a keyword rong*, the result shows all articles containing words like rongi, rongile, rongkäigus, rongijuhi, rongiaegadega, rongaema etc.
Detailed Search
Detailed search enables you to narrow down and limit you search by several features and combine different search fields. The link Detailed search can be found on the right of the main search field.

Detailed search helps you limit the results by:
One or more publications
The publishing date
Language

You can search from the whole portal (full text) or you can choose to search only by article headlines, author or tags.
Search Result
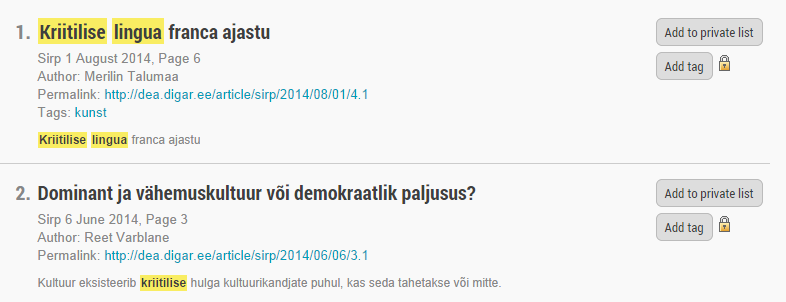
The result is shown as a numerated list of found articles or pages. It contains bibliographic data, such as:
Article headline
Author(s)
Permalink (for an article or page)
Publication, publishing date, article’s position in the publication (page numbers)
Tags added by users
A text fragment containing the keyword (only for an exact match)
Limited Result
To narrow down the search results, use thematic clusters assembled according to many features, such as:
Publication
Category
Author
Language
Publication type
Decade
Tags
Word count
Availability
The features are sorted according to frequency. Not more than four of the first features are opened by default in the thematic cluster. The whole cluster opens when you click below it on the link More.... To inactivate some of the limiting features, click the icon x.

NB! The clusters values are case sensitive! E.g. if you are looking for an author in the form of Ülle Tamm, it will be presented in the thematic cluster also as ÜLLE TAMM. The system does not merge the different forms together, in the author’s thematic cluster they will be shown on separate rows.
Order of the Results
By default the results are ordered so the best matches are first. The results can also be reversed and/or ordered according to other features:
title
author
publication
date (both newest first or oldest first)
Browsing the Publications
For browsing you can use a calendar, the list of publications and the table of contents of a specific issue. The calendar is useful for searching articles by date. Clicking on a certain date opens a list of all publications published that day.
The list of publications (the tab PUBLICATIONS) opens an alphabetical list of all publications in the portal.
Clicking on publication categories opens a list of publications belonging to that certain category. There you can also choose to see the full list (link Show all publications).
Permalinks
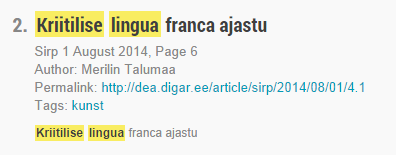
Articles, pages, publication issues and publications have been provided with permalinks. For articles and pages, they are shown in the search results.
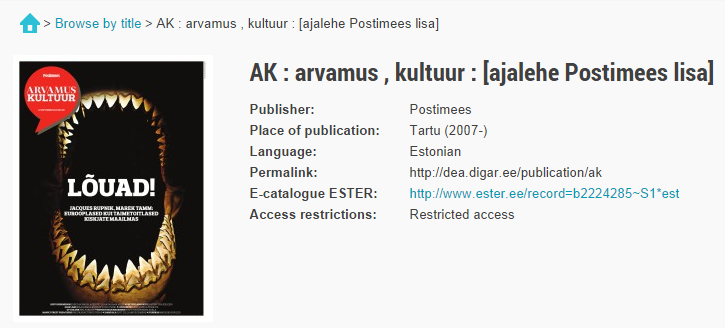
For publications, permalinks are shown in the publication’s information box.
Content Viewer’s Functions
Depending on copyright agreements and digitisation technology, the publication may open on three different levels: publication, page or article.
The content viewer is divided into two parts: the right side displays the publication’s picture and the left side displays the table of contents, the text, a link for editing and an option to add tags. Choosing an article by clicking on the table of contents, the article will be brought forward on the right and its automatically recognised text will appear on the left instead of the table of contents. Clicking on the right side (on the publication’s picture) on some other article, it will be brought forward and its automatically recognised text will appear on the left. The keywords are marked (only the exact match) in the article and also in the automatically recognised text.
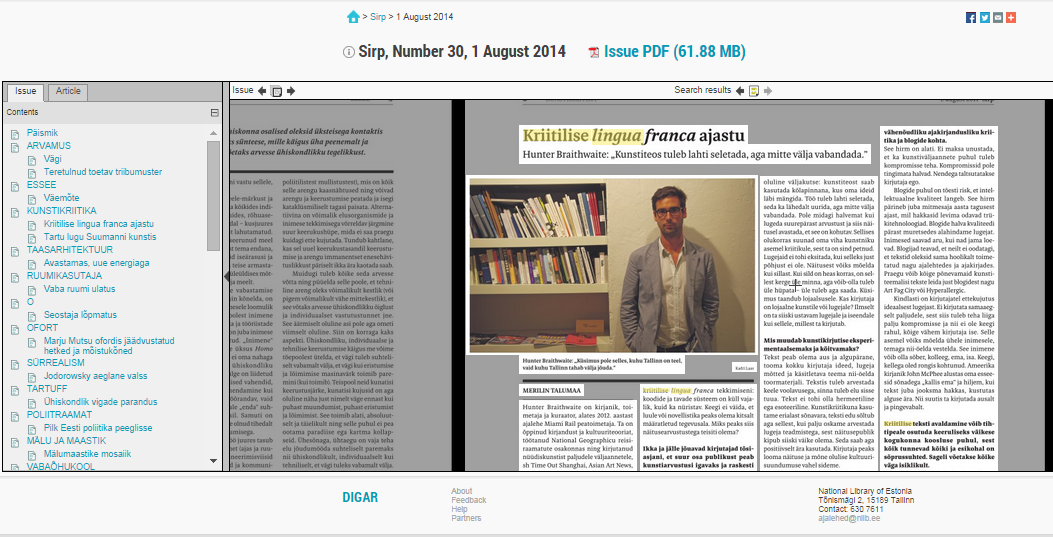
You can browse the publication by dragging the picture on the right. Moving around the publication on the right, the parts where the cursor is on the moment are highlighted. The content viewer lets you move to the previous or next issue or search result. You can also zoom in and out. Publications and pages in PDF format that do not have access restrictions can be downloaded for printing.
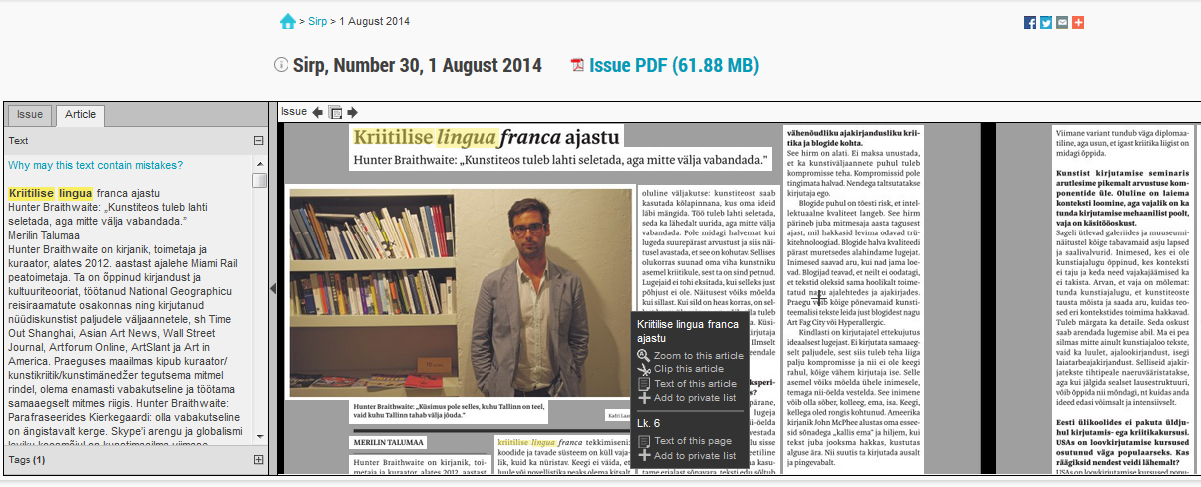
The content viewer lets you print chosen articles – right-click on the article and choose Clip this article. The clipped article will be automatically aligned in one column and displayed according to the size of your own monitor, so the result might not be exactly the same as it was in the newspaper.
NB! If access restrictions have been applied to the publication, the content viewer displays only the lock icon and information about the restrictions (e.g. View access: in the National Library of Estonia and other libraries receiving legal deposit copies).
OCR – Optical Character Recognition
OCR (Optical Character Recognition) is an automatic text recognition process, during which documents are analysed with special software that identifies the parts containing text, pictures and tables.
OCR enables searching of large quantities of full-text data, but it is never 100% accurate. The level of accuracy depends on the print quality of the original issue, its condition at the time of microfilming, the level of detail captured by the microfilm scanner, and the quality of the OCR software. Issues with poor quality paper, small print, mixed fonts, multiple column layouts, or damaged pages may have poor OCR accuracy.
To look at the OCR text, right-click on the article or page in the document viewer and choose the "Text of this article" or "Text of this page" option.
Editing the OCR Text
You can edit the automatically recognised text of the newspapers published before 1944. Corrections can be made only by users who have registered and logged in with their library username, ID-card or Mobile-ID.
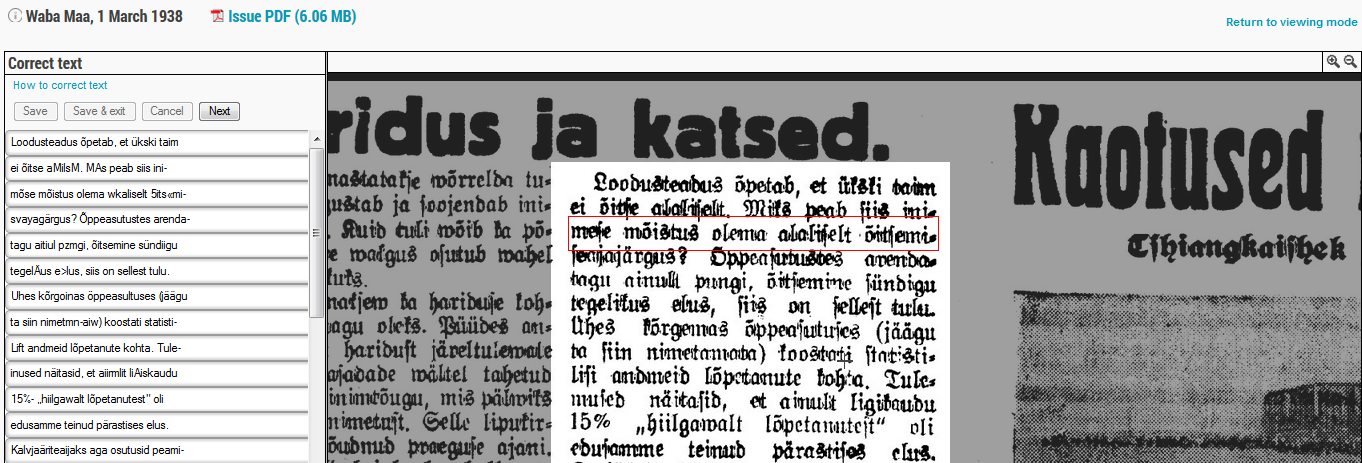
To edit text, click on the left side of the viewer Correct this text. Choose a part you want to edit (e.g. an article). Now you can see the automatically recognised text on the left and you can edit it right there. The text can be edited row by row. The red box on the right helps you to follow the rows and see which text belongs to a certain row. When you have finished editing, click Save. NB! All saved changes will be immediately visible for all users. To quit, click Cancel, and all changes made since the last save will be cancelled.
You can continue editing by clicking Next on the following row or choosing another part on the right side of the viewer. To exit the editing mode, click Return to viewing mode. By clicking on the Save & exit, you can save and return to the viewing mode at the same time.
NB! Corrections have to be made exactly according to the way the text was published in the newspaper. You may not edit typographical errors or change punctuation marks and syntax or add your own comments and additions etc. Changes are being tracked by a moderator with the right to decline incorrect changes.
Personalised Services – My DIGAR
You have a lot more possibilities when you are logged in. To protect your personal data, always click Log out when you leave your account.
Adding Tags to Articles
Users can add their own tags to articles (link Add tag). A list of added tags is displayed in the tab TAGS. A thematic cluster is formed of the added tags; thereby helping you to limit your search. You can add or view added tags on the search result page and in the content viewer. Tags can be deleted only in the publication’s content viewer. To change a tag, delete the old one and add a new one.
Tags can be added only by users who have registered and logged in with their library username, ID-card or Mobile-ID.

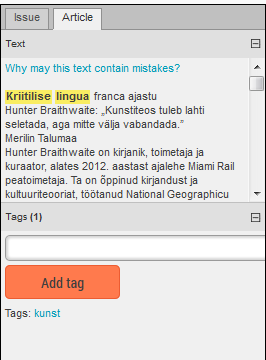
You can see your added tags here: My account >> Recent activity >> Recently added tags.

NB! Tags have to be added according to the content of the article and following orthographic rules. Tagging is being tracked by a moderator with the right to edit incorrect tags and delete inappropriate or otherwise out of place tags.
Adding Articles to Private Lists
On the search result page, you can add articles to your own private list (link Add to private list). ). Lists can be formed only by logged in users.
Clicking on Add to private list you can form a new list or choose an existing one. While adding an article to a list, you can also add a note. You can form up to 10 lists and one list can contain up to 250 entries.
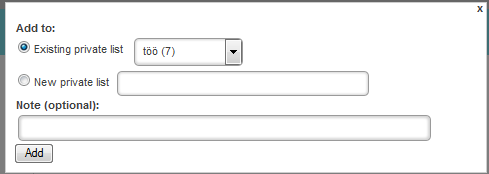
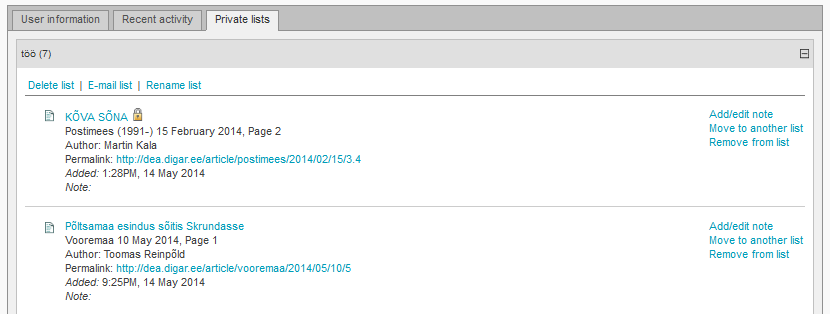
You can see your lists here: My DIGAR >> Private lists.
You can e-mail the gathered entries (link E-mail list). The list can be modified by:
changing its name
deleting it
removing an article from it
moving an article to another list
adding/editing article notes
Printing
Articles can be printed directly from your web browser, after selecting the article and clicking the "Clip this article" link.
If available, PDF versions of issues and pages can be downloaded for printing.
Technical Requirements
All common web browsers like Firefox, Google Chrome and Internet Explorer are suitable for using the portal. To view and print PDF files, you need a PDF viewer, such as Acrobat Reader.
